

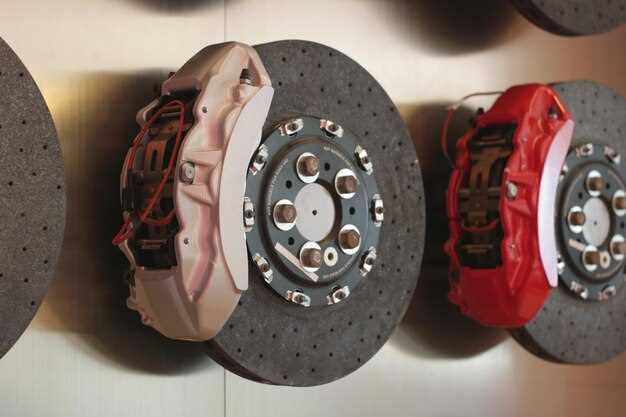
When it comes to maintaining a high-performance vehicle, understanding the signs of brake pad wear is crucial, especially for those who push their cars to the limit on the racing circuit. Brake pads play an essential role in ensuring the safety and efficiency of your braking system, and recognizing their state can prevent more extensive damage and costly repairs.
Many drivers may overlook subtle changes in their vehicle’s braking performance until it’s too late. As brake pads wear down, they may produce distinct sounds, vibrations, or even reduced stopping power. In this guide, we will outline the key indicators that signal the need for brake pad replacement, helping you monitor your vehicle’s condition effectively and ensuring optimal safety on the road or track.
Properly maintaining your brake pads is not just about preserving performance; it’s also about enhancing your overall driving experience. Whether you’re a casual driver or a racing enthusiast, understanding the importance of these critical components will empower you to make informed decisions regarding their maintenance and replacement. Get ready to dive into the essential signs that indicate it’s time to change your brake pads.
Understanding Common Symptoms of Worn Brake Pads
Brake pads are crucial for ensuring the safety and performance of your vehicle. When they begin to wear down, several symptoms can indicate the need for immediate attention. Understanding these signs is essential, especially for those engaged in racing or high-performance driving, where braking efficiency is paramount.
1. Squeaking or Squealing Noise: One of the most common symptoms of worn brake pads is a high-pitched squeak or squeal when applying the brakes. This noise often results from a wear indicator designed to alert drivers about impending replacement. Ignoring this sound can lead to more severe wear on your braking system.
2. Grinding Noise: If you hear a grinding noise while braking, it signifies that the brake pads are significantly worn down and the metal backing is making contact with the rotor. This not only decreases braking efficiency but can also damage the rotors, leading to costly repairs.
3. Reduced Braking Performance: If you find your car takes longer to stop or feels less responsive when braking, worn brake pads may be the culprit. This reduced performance is particularly dangerous in racing scenarios, where precise braking is necessary for optimal control and safety.
4. Vibration or Pulsation: A spongy feel or vibration in the brake pedal can indicate uneven wear or damage to the brake pads. Inconsistent braking creates instability, which can affect speed and control, especially during high-speed racing conditions.
5. Warning Light: Many modern vehicles are equipped with a dashboard warning light that alerts drivers when brake pads are worn. If this light activates, it’s vital to check the brake system immediately. Ignoring this warning may lead to compromised safety on the road or track.
6. Longer Stopping Distances: If your vehicle requires more distance to come to a complete stop, your brake pads may be nearing the end of their lifespan. This symptom can be particularly risky in racing situations, where even slight delays can result in collisions or loss of racing position.
Identifying and addressing these signs of worn brake pads promptly is essential for maintaining performance and safety on the road and during racing. Regular inspections and timely replacements can help ensure that your braking system remains reliable and effective.
Identifying Optimal Replacement Timing for Racing Conditions
In racing scenarios, the performance of brake pads is critical for both safety and speed. Identifying the right time for replacement directly impacts lap times and overall vehicle control. Regular inspection of brake pads is vital, as racing induces higher stress and temperatures that accelerate wear.
Monitor the thickness of the brake pads. For high-performance racing, replacement should be considered when the material wears down to approximately 3mm. At this thickness, the pads may still function, but effectiveness diminishes, and the risk of brake fade increases. It’s essential to replace brake pads regularly to maintain optimal braking response.
Pay attention to any unusual noises during braking. Squeaking or grinding sounds indicate that the pads have worn down considerably. This signals imminent failure and necessitates an immediate replacement to avoid rotor damage and maintain track performance.
Environmental factors can also influence pad wear. High temperatures increase friction, which can lead to quicker degradation. Therefore, regular monitoring during races or practice sessions is crucial. Racing conditions often dictate more frequent replacements than standard driving scenarios.
Consider the type of racetrack being used. Tracks with frequent sharp turns place greater demands on brake systems, leading to faster wear. If you’re frequently racing on such courses, adjust your replacement schedule accordingly. Evaluating the performance characteristics of your brake pads in relation to the track can help in determining appropriate replacement intervals.
Finally, it is beneficial to maintain a log of your pad usage under various conditions. Documenting performance and wear rates can help predict future needs and establish a replacement routine tailored to your specific racing style and environments.
Step-by-Step Guide to Replacing Brake Pads in Performance Vehicles
Replacing brake pads in performance vehicles requires precision and attention to detail to ensure optimal performance. Follow this step-by-step guide for a successful replacement process.
Step 1: Gather Necessary Tools and Materials
Before starting, collect all necessary tools: a jack, jack stands, a lug wrench, a C-clamp or brake caliper tool, and new performance brake pads. Ensure the area is well-ventilated and safe.
Step 2: Lift the Vehicle
Use the jack to lift the front or rear of the vehicle, depending on which brakes you are replacing. Secure the vehicle on jack stands to ensure it is stable before proceeding.
Step 3: Remove the Wheel
Using the lug wrench, loosen and remove the wheel bolts. Carefully take off the wheel to expose the brake assembly, ensuring you place the wheel safely aside.
Step 4: Inspect the Brake System
Before removing the brake pads, inspect the entire brake system for any signs of wear or damage. Check the rotors for warping or scoring, as this may also require attention.
Step 5: Remove the Caliper
Locate the caliper mounting bolts and remove them using a socket wrench. Carefully slide the caliper off the rotor. Make sure not to let the caliper hang by the brake line; support it with a bungee cord or similar tool.
Step 6: Remove Old Brake Pads
The old brake pads are typically held in place by retaining clips or pins. Carefully remove these components and then slide out the worn pads. Take note of their position for proper installation of the new pads.
Step 7: Compress the Caliper Piston
Use a C-clamp or brake caliper tool to compress the caliper piston back into its housing. This step creates enough space for the new, thicker pads. Monitor the brake fluid reservoir to prevent overflow.
Step 8: Install New Performance Brake Pads
Position the new brake pads in the caliper bracket, ensuring they fit snugly. Reinstall any retaining clips or pins to secure the pads in place. Make sure they are positioned correctly for even wear.
Step 9: Reattach the Caliper
Slide the caliper back over the new pads and securely fasten it by reinstalling the caliper mounting bolts. Ensure they are torqued to the manufacturer’s specifications for safety.
Step 10: Reinstall the Wheel
Place the wheel back onto the hub and hand-tighten the lug nuts. Once the wheel is on, lower the vehicle slightly and then tighten the nuts to the recommended torque with the lug wrench.
Step 11: Test the Brake System
Before taking the vehicle on the road, pump the brake pedal several times to ensure the pads seat correctly against the rotors. Check for any unusual noises or issues and perform a short test drive to verify proper function.
Following these steps will ensure a reliable and effective brake pad replacement in performance vehicles, allowing for enhanced braking performance during racing and daily driving.


