

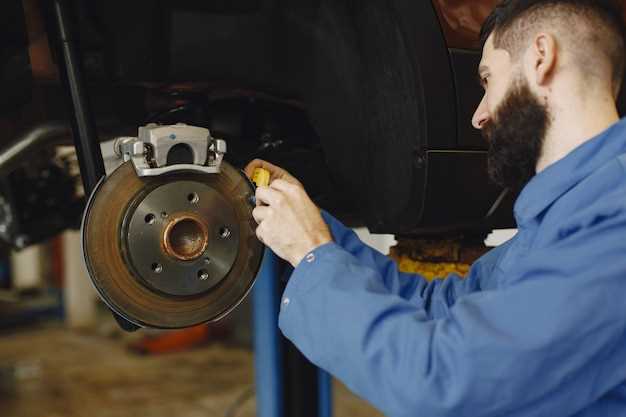
Resealing a valve cover gasket is a critical maintenance task that ensures the proper functioning of your engine. A worn or damaged gasket can lead to leaks, which may result in oil loss and potential engine damage. Understanding how to effectively reseal a valve cover gasket will not only help maintain optimal engine performance but also prolong the lifespan of your vehicle.
The valve cover serves as a protective layer over the engine’s cylinder head, housing components like valve lifters and camshafts. A secure and intact cover is essential to prevent oil from escaping and dirt from entering the engine. Over time, factors like heat, vibration, and exposure to various chemicals can degrade the gasket material, leading to leaks. Therefore, learning the proper techniques to reseal a valve cover gasket is essential for any car enthusiast or vehicle owner.
In this guide, we will explore the tools and materials needed for the resealing process, as well as step-by-step instructions to ensure that your valve cover is properly sealed. With attention to detail and the right approach, you can effectively address any gasket issues and maintain a healthy engine environment.
Identifying Symptoms of a Leaking Valve Cover Gasket
A leaking valve cover gasket can lead to several noticeable symptoms that indicate a problem. One of the primary signs is the presence of oil leaks around the edges of the valve cover. If you notice dark oil spots or streaks on the engine or the ground beneath the vehicle, it’s a strong indication that the gasket may be compromised.
Another symptom to watch for is an oily residue accumulating around the top of the engine. This buildup can occur as oil seeps out from under the cover, making it visibly dirty and greasy. A thorough inspection of the valve cover area will often reveal these signs, especially after the engine has been running.
Moreover, an unusual smell can arise from the engine bay due to leaking oil. As the oil escapes and comes into contact with the hot engine surfaces, it can produce a burning odor. This smell can be alarming and should not be ignored, as it may indicate a significant leak.
Engine performance issues may also manifest if the valve cover gasket is leaking. This includes a rough idle or misfiring, which can occur due to oil seeping into the ignition components or the intake system. Additionally, oil consumption may increase as the engine works harder to maintain performance levels, leading to the need for more frequent oil top-ups.
Lastly, if you notice a drop in oil pressure or the oil warning light illuminating on the dashboard, it could be a sign of a more serious issue with the valve cover gasket. Consistent monitoring of these symptoms can help catch a leak early, preventing potential damage to the engine.
Step-by-Step Guide to Removing the Old Gasket
Before starting the gasket removal process, ensure that the engine is cool and the vehicle is parked on a flat surface. Gather necessary tools such as a screwdriver, socket set, and gasket scraper.
Begin by draining the engine oil to prevent any spills. Locate the oil drain plug under the vehicle, place an oil catch pan underneath, and remove the plug to let the oil flow out. Once the oil is completely drained, replace the plug and tighten it to prevent leaks.
Next, disconnect the negative battery cable to eliminate any electrical hazards during the process. This ensures the engine won’t accidentally start while you’re working on it.
Remove any components obstructing access to the valve cover. This may include the air intake tubing, ignition coils, or any brackets that run over the cover. Use the screwdriver or socket set to remove these parts carefully.
Once you have clear access to the valve cover, loosen and remove the bolts securing it in place. It’s advisable to keep track of the order and location of the bolts for reassembly. After all bolts are removed, gently lift the valve cover off. If it’s stuck due to old adhesive or oil residue, lightly tap it with a rubber mallet to loosen it.
After removing the valve cover, the old gasket will likely remain stuck to the cover or the engine block. Use a gasket scraper or plastic putty knife to carefully peel off the old gasket material. Be cautious not to scratch the surfaces as you remove the remnants of the gasket.
Wipe down the contact areas on both the valve cover and the engine block with a clean rag to ensure no debris is left behind. This step is crucial for a proper seal with the new gasket. Inspect both surfaces for any damage; if necessary, repair or replace components that show signs of wear.
With the old gasket removed and surfaces cleaned, you are now ready to install the new valve cover gasket. Following this step-by-step guide will help ensure a successful gasket replacement and prevent potential oil leaks in the future.
Techniques for Properly Installing a New Valve Cover Gasket
Installing a new valve cover gasket requires meticulous attention to detail to ensure a proper seal and prevent leaks. Follow these techniques for effective installation:
1. Clean the Surface: Begin by thoroughly cleaning the mating surfaces of both the valve cover and the engine cylinder head. Use a gasket scraper or a soft abrasive pad to remove any old gasket material, oil, and debris. Ensure that the surfaces are smooth and free of contaminants.
2. Inspect the Valve Cover: Before installation, check the valve cover for any warping or damage. A warped cover can lead to leaks. If necessary, consider replacing the cover or using a small amount of sealant in conjunction with the gasket.
3. Apply Gasket Adhesive: Applying a thin layer of gasket adhesive on one side of the new gasket can help hold it in place during installation. This is especially useful if the valve cover is difficult to handle or if the gasket tends to slide off.
4. Position the Gasket: Carefully position the gasket onto the valve cover, ensuring it aligns correctly with all bolt holes and any other features. Press down gently to secure it in place.
5. Use Proper Torque Settings: When reinstalling the valve cover, tighten the bolts in a crisscross pattern to distribute pressure evenly. Refer to your vehicle’s service manual for the recommended torque specifications and adjust accordingly to avoid overtightening.
6. Allow Time to Set: If you applied adhesive, allow the gasket to set for the recommended time before starting the engine. This will ensure a solid bond between the gasket and the surfaces, minimizing the chance of leaks.
7. Final Check for Leaks: After installation and allowing time for curing, run the engine and check for any oil leaks around the valve cover area. Address any leaks immediately to ensure proper engine function.
By following these techniques, you can ensure a successful installation of a new valve cover gasket, contributing to the longevity and performance of your engine.


